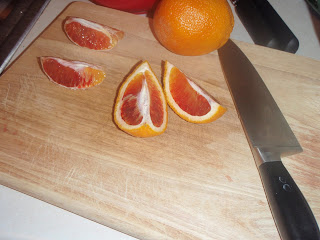
I really love any sort of beer with fruit in it so I've been dying to do one since last years Blueberry Wheat that a friend and I whipped up. I really REALLY love Minneapolis Town Hall's Mango Momma and I'd love to try to replicate that. I know I won't be able to though because I don't have a draught system (yet) and I can't just age a IPA on Mango's in a keg. So I'm going to take a couple pounds of fresh Mango's, toss them in the secondary and let my brew do it's thing. I also decided that Blood Oranges would be fun to use because they are in season and pretty damned tasty.

I didn't really have much of a plan when I decided what fruits I wanted to use but over the last week I came up with a beer base. I wanted to keep the hops fruity and the bitterness fairly low. So I went with Amarillo and Simcoe and the majority in the last 15 min of the boil. I kept the base of the beer fairly simple with a lot of 2-Row, some Crystal 20 for color and White Wheat for head retention. Decided to throw in about 8ounces of Oats to keep things silky smooth. I'm only doing a 4 gal batch so 2 gal on each fruit is gonna be real nice.
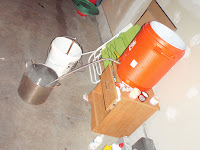
My brew day went really smooth and I'm pretty sure I set a all-time record for not screwing up and not forgetting anything. Since it damn near hit 30 today it was pretty darned warm (for Minneapolis) and I even had a chance to wash my car during the boil. I missed my mash temp by 1 degree which shouldn't be a huge deal but I'm fairly anal about getting my mash exact. Once the boil wound down and I got the wort down to pitching temp, I tried 2 new purchases. A 8 gal nylon mesh bag and a simple fish tank air pump attached to a diffusion stone to aerate my wort. The nylon mesh bag worked great! I lined my fermenter with the bag and just poured my cooled wort into the bag. Pulled the bag out and Viola!, all the hops and crud were gone! Too bad the air pump didn't work as good... Since it didn't work AT ALL!! Gotta take that back damnit!
I really look forward to the results on this one. I hope the fruit really comes through.
Recipe
--------------------
Batch Size - 4 Gallons
Boil Size - 5.2 Gallons
Total Grains - 10.5lbs
Anticipated OG - 1.057
Boil Time - 60 min
Bitterness - 41.1 IBU's
Grains
--------------------
8.0lbs American 2-Row (36 ppg, 2 SRM) - 76.19%
1.0lbs White Wheat (40 ppg, 2.4 SRM) - 9.52%
1.0lbs Crystal 20L (35 ppg, 2.0 SRM) - 9.52%
0.8lbs Raw Oats (37 ppg, 1 SRM) - 4.76
Hops
--------------------
0.25oz Simcoe (13% Pellet) - 60 min
0.25oz Simcoe (13% Pellet) - 30 min
0.25oz Simcoe (13% Pellet) - 15 min
0.25oz Amarillo (8.5% Pellet) - 15 min
0.25oz Simcoe (13% Pellet) - 5 min
0.25oz Amarillo (8.5% Pellet) - 5 min
0.50oz Amarillo (8.5% Pellet) - 0 min (Whirlpooled)
Yeast
--------------------
Fermentis - Safale US-05 (75-80%, 59-75F)
Extras
------------------
1tsp Irish Moss - 5 min
Brewed 2/21/2010
Pitched my yeast at about 80 degrees and it was bubbling away fairly aggressively the next morning at about 70 degrees. I might let it go another day before taking it downstairs and hopefully getting it down to the mid 60's.
OG was measured at 1.058. Right at 60% efficiency which is exactly what I planned for when I put together this recipe. I still suck... Even crushed the grains a quite a bit more than usual.
2/28/2010
OG: Measured at 1.012. Corrected to 1.013 at 71 degrees. Should put this brew right at 6% ABV.

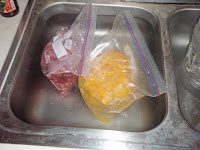
Transfered 2 gal of the beer to a 3 gal carboy with about 2 1/2 pounds of Blood Oranges and the other 2 gal to a 5 gal carboy that has about 3 pounds of Mango's. I also added maybe 3-4 tablespoons of Blood Orange zest that I had soaked in tequilla for about a week to the Blood Orange carboy.

The beer wasn't too bad but the yeast was too prominent and it really could have used a bit more late additions. Since this brew is getting quite a bit of fruit added to it I'm not too worried about it though. If I ever just wanted to make this beer, I'd easily double or triple the late hop additions. The beer wasn't too bitter at all either so I might even bump up some of the early bittering Simcoe. The color was okay but it was super cloudy. No more White Wheat in a Pale Ale. Live and learn I suppose.
I think I'll let the beer sit on the fruit for at least 14 days. I'll shake or stir the carboys every couple days to make sure the fruit sugars get fully fermented. I really think these are going to be really tasty. Wish I could serve on draft to really keep the fruit nice and fresh tasting.
3/19/2010
Well I ended up letting the beer sit for almost an entire month. I swished the fruit and beer around about once a week and wanted to be 100% sure the beer was finished. The mango's looked the same for the most part but the blood oranges had a really pale, gross look to them. Although they were still firm, almost all the color was out of them. Weird stuff.
When I tasted the beers upon bottling the mango was really really good. The mango was nice and potent and I'm excited to what it'll taste like carbonated. The blood orange on the other hand was kind of weird. It has a fairly strong blood orange flavor but something is missing. I either needed more hops to add a bit more flavor and bitterness, or I needed to somehow make it sweeter. It's not horrible, but definitely wasn't I was going for. Hopefully it'll change a bit in the bottle. I look forward to the results.
 an. I just wanted to melt enough wax to cover the lip of the growlers (and eventually the caps of Langs Lil Smokey since I had extra wax). Keep in mind, the little wax beads will melt down quite a bit so add a bit more than you think you'll need.
 melting, the rest of the beads quickly follow. It eventually turns out to be nice and smooth and even seems a bit thin (my picture is rather blurry, I know). No worries though because once you dip the lids , the wax cools very quickly. I was able to do the growlers and my last 15ish Lil Smokey bottles in about 5 min. Once the wax fully cools and hardened, i just left it in the can and put the can a Ziploc bag to be reused the next time I need some wax. Eazy Peezy and the bottles look really cool.